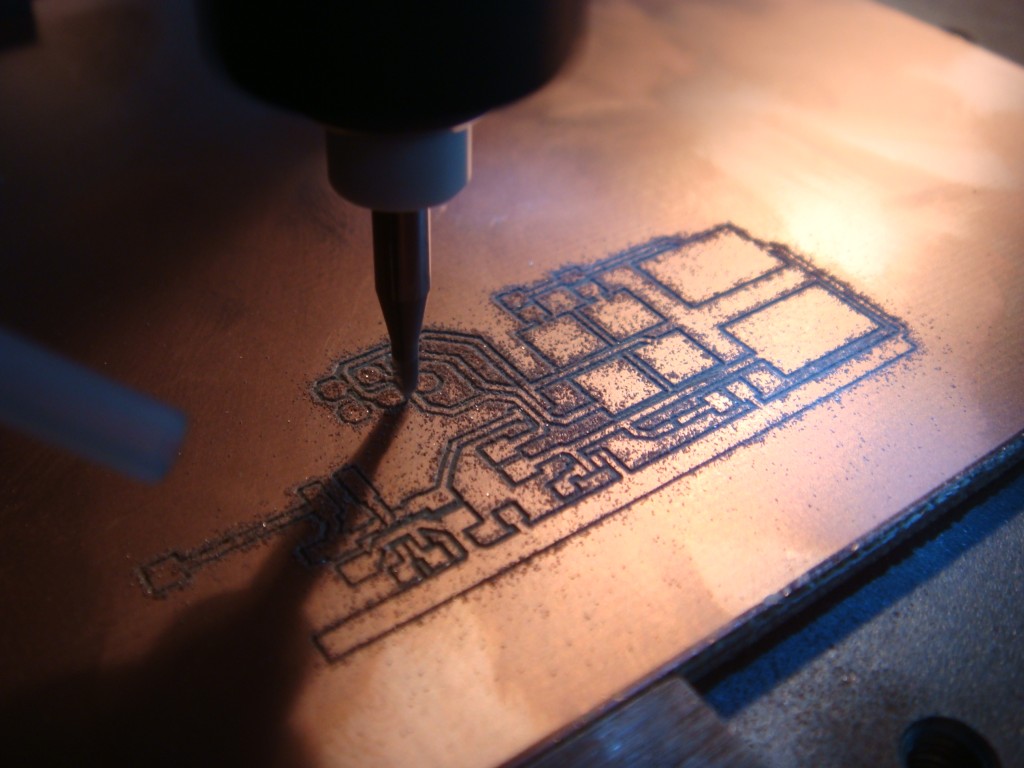
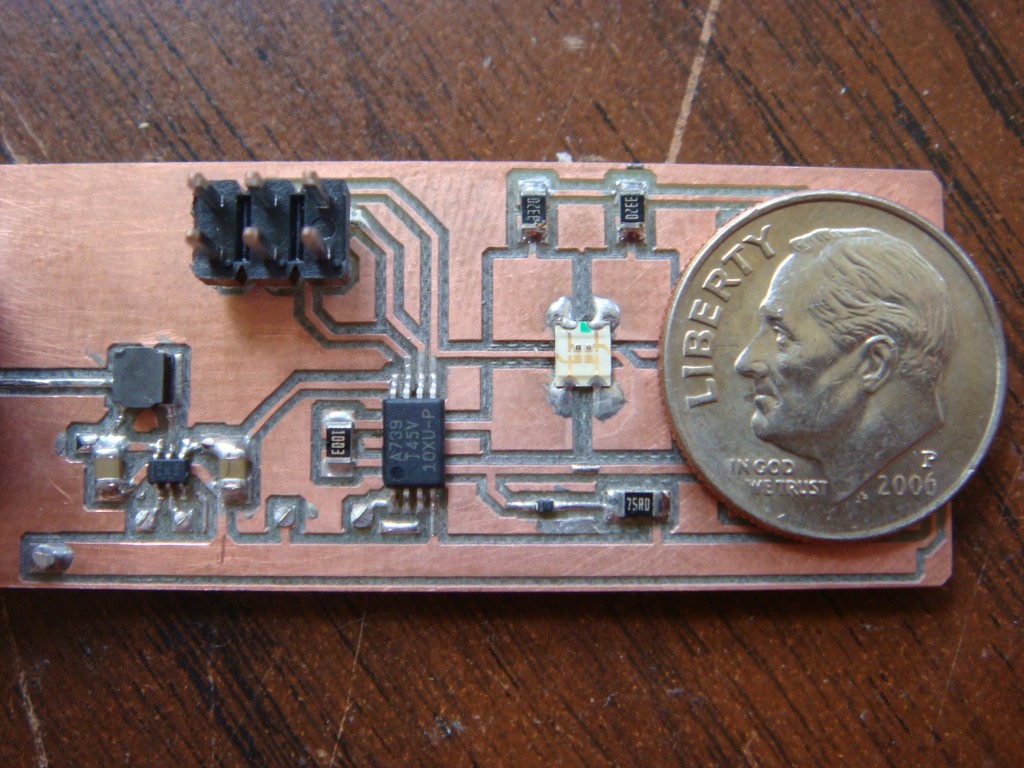
0.008″ PCB trace isolation on my CNC
Due to a new design that I am working on, I needed to use a component from TI that only came in a 6SC70 package. It’s a boost converter (TPS61221) that operates from an input voltage as low as 0.7V and has 80% or better efficiency in the 1-10mA range. It’s trimmed at 3.3V, which I’m using to run an ATtiny45V. The ATtiny45 comes in a fine-pitch package as well, an 8TSSOP that requires 0.009″ isolation between pads. I haven’t been able to get much better than 0.020″ with the tooling I have, so I have been looking for alternatives.
I found some mechanical engraving bits at Think & Tinker which is actually here in Colorado at Palmer Lake. Their URL descriptor says they offer “Instrument and PCB prototyping equipment”. They also sell carbide engraving bits, and the particular one I selected was the 60° cutter, part number #EM2E8-0625-60V. The bits came in a nice container and are labelled as having a 0.005″ tip. The shipping was also wicked fast. Granted, it’s only a few hours away from my location but I ordered them and got them in the next day.

I’ve only cut one board, but I’m really happy with the results. I successfully achieved 0.008″ isolation between the pads of the devices, and now I can finally route traces inbetween the pads of 0.1″ headers. I couldn’t do that before.

5 Comments to 0.008″ PCB trace isolation on my CNC
Leave a Reply
Other Stuff
Recent Posts
- 6CY7 dual triode valve amplifier
- Air quality sensor (TVOC and eqCO2)
- Automotive rear fill “surround sound” with Boss DD-3
- Spring tester / weight scale
- Ducati 749/999 Tail Light
- Instruments for the GSXR
- Light pipe tail light for the GSXR
- M17x 6990m / 6970m overheating
- PAR / Spectrum analyzer
- Acrylic polishing and scratch removal
Archives
- May 2019 (2)
- April 2017 (3)
- October 2015 (1)
- May 2015 (1)
- March 2014 (2)
- December 2013 (1)
- July 2013 (1)
- November 2012 (1)
- October 2012 (4)
- September 2012 (1)
- August 2012 (3)
- June 2012 (1)
- March 2012 (1)
- February 2012 (1)
- January 2012 (1)
- October 2011 (3)
- July 2011 (1)
- June 2011 (3)
- May 2011 (2)
- April 2011 (1)
- December 2010 (1)
- August 2010 (1)
- July 2010 (3)
- April 2010 (2)
- March 2010 (2)
- January 2010 (2)
- December 2009 (2)
- October 2009 (2)
- September 2009 (1)
- August 2009 (15)
I’m truly impressed! It is always fun to improve something done before. I kind of gave up on doing my own boards when the new tiny components became the standard.
Haven’t forgotten the board I was going to send you -just haven’t gotten around to it (same with looking for your panaramic photos). Good to hear from you.
[…] like to see the final product milling PCBs. We’ve always been a little jealous of the PCB milling setup that [imsolidstate] has in his […]
[…] like to see the final product milling PCBs. We’ve always been a little jealous of the PCB milling setup that [imsolidstate] has in his […]
Hi. What is the lifetime (# of boards) of the drill bits? Also emailing this question.
I’m not really sure, I’ve easily made upwards of a dozen boards and I’m still using the same cutter and set of drill bits. As for the drill bits I’m trying to use as much surface mount components as possible, so these days I’m mostly drilling vias. Resharpened carbide bits aren’t too expensive anyway, you can get sets at drillbitcity.com or ebay.