Uncategorized
M17x 6990m / 6970m overheating
How to fix AMD 6900 series cards overheating in the Alienware M17x. › Continue reading
Acrylic polishing and scratch removal
I recently acquired a 46 gallon ZeroEdge aquarium that was in pretty rough shape. There were a lot of scratches as well as marks from calcareous algae. Here is what I did to repair it. › Continue reading
Continuous vs. batch water changes
I have been wondering lately about the effectiveness of building a continuous or automatic daily water change system for my reef aquarium. I really hate batch water changes, but they seem like they would be more effective. I decided to do the math and find out if that was true. A continuous water change can be modeled as a differential equation:
where is the amount of some dissolved substance at time
,
is the flow rate in and out of the system, and
is the volume of the tank. We can simplify the model by making some assumptions: a continuous water change will consist of a small volume over a long period of time, thus the flow rate will be low enough to assume complete mixing in the high water flows of a reef aquarium. Flow rates should be chosen to provide an equivalent reduction of dissolved material as a weekly batch water change, however the rate is not of interest here since we are purely interested in comparing the amount of dissolved material reduction with a batch water change, not how long it will take. It will be easiest to calculate volume with a flow rate of 1 liter per hour. We can also assume an input concentration of 0, since the water coming in should be from an RO/DI system. This gives:
noting that my aquarium is 75 gallons, or 284 liters. We will also set this up as an initial value problem, with
being an initial concentration of 50 mg/L of nitrate. The goal is reduction to 45 mg/L which we will compare to a batch water change later. For my 284L aquarium, the total concentration of nitrate would be
. This gives:
The particular solution for this IVP is:
BT5 USB flash drive persistent install
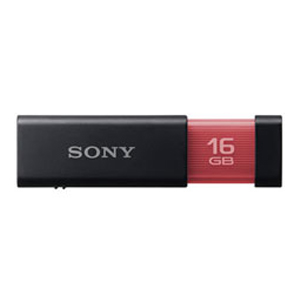 Thanks to the computer systems security class I am taking for my masters program, I’ve been messing around with Linux for about a month now trying out different distros and figuring out the tools in Backtrack. BT is really useful but it’s annoying to always have to start from scratch with the live image, especially if you need drivers that aren’t included on the iso. A persistent installation is the way to go but I couldn’t get any of the methods I found on the web to work. I figured out an easy way that worked for me so I thought I would post it. › Continue reading
Fix your Keurig
The Keurig is a cool machine, but it has a bit of a flaw. There are two needles that pierce the K-cup, one at the top and one at the bottom. Since the needle at the bottom is piercing plastic and the needle at the top is piercing foil, the needle at the top will pierce first. This wouldn’t be a big deal but the top needle is hollow in the middle and connected to the water supply. When you press down to puncture the K-cup you pressurize the cup so that when it does pierce the foil coffee from the cup is pushed up into the needle. Over time the coffee builds up in the tube behind the needle until one day all those coffee bits conspire together to clog the needle and it won’t brew. Mine only took a little over a month to do this.
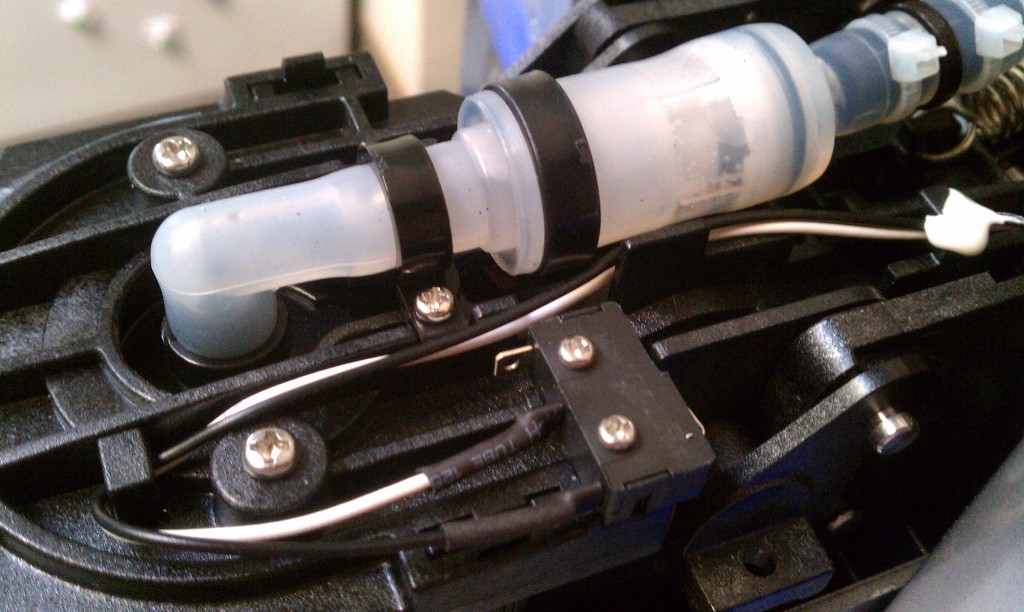
It’s not too hard to fix. You have to get some of the plastic covers off of your Keurig though. You will need a philips screwdriver and a T15 Torx driver. All of the Keurigs are a bit different on the outside, but they all appear to have the same mechanism for handling the K-cup. So your covers might be different but the internals are probably the same. Take the covers off so you can get to the internal plumbing. › Continue reading
Forza 3 multiscreen setup
I recently put together a multiscreen setup of Forza 3 motorsports for Xbox 360. Forza 3 is the first driving game I’ve played that made spending the time and money worth it. However, I had a few annoying problems along the way so I’m writing this article to potentially help anyone with problems like I had. This isn’t about how to use multiscreen to increase the field of view on one monitor (which is about all you can find on the web). It’s about using three screens together for one wide display with Forza 3. At the end I share how I did all this for cheap.
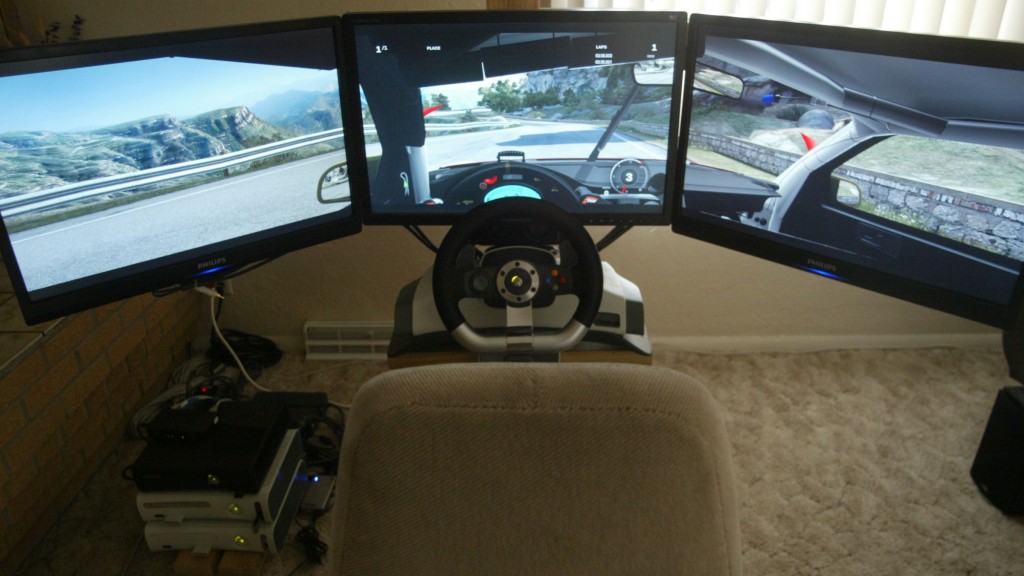
First off, you need three of the SAME copies of Forza 3. Mixing in an ultimate collection with the regular versions won’t work, they won’t connect. It took me a while to figure this out. Either use three ultimate collection versions or three regular versions. If you have three regular copies and you bought the ultimate to get more cars, you don’t need to go out and buy two more UC copies. Just put the UC disc in each machine and install disc 2. Then put the regular copies back in.
Second, you need a switch. I read somewhere on forzamotorsport.net that the data sent between the three Xboxes is a large amount of minimum frame size packets so a hub will work but you run the risk of dropping packets which will cause lag. Remember a hub and a switch do the same thing but a switch can learn where packets need to go based on their address, and a hub always just broadcasts to all stations. That is, a switch is more efficient. Use the uplink port of the switch that connects the three Xboxes to connect to your wireless router or gateway (internet).
Then you will need to verify the connection between the three Xboxes. There are a lot of people on the web saying that you need to be connected to Xbox Live, you need a Gold subscription to Xbox Live for each console, etc. None of this is true. You don’t need Xbox live for this to work. I know because I tested the multiscreen capabilities before I signed any of my consoles on to Xbox live. In fact I probably wouldn’t have bothered with Xbox live but I wanted the LFA from Stig’s Garage car pack.
Anyway, sign in on the Xbox that will be your center station, it will be the host and have your profile. It is easiest to test your connection by connecting to Xbox live through the test network utility in the console settings. If you go to: my Xbox / console settings / network / test settings it will test the connection from the console all the way through the local network to Xbox live. If you feel like it you can log on to your router and assign a static address to the three Xboxes to keep it tidy. You can see what IP each of your consoles was assigned by the router in the network settings on the console. All that matters is that they are different and in a range accessible to your router. None of that is really necessary though, if you only have a switch connecting the three consoles. The Xboxes will each assign themselves an address if they can’t find a DHCP server like your router. Your router is typically what assigns local IP addresses. › Continue reading
DIY Router table
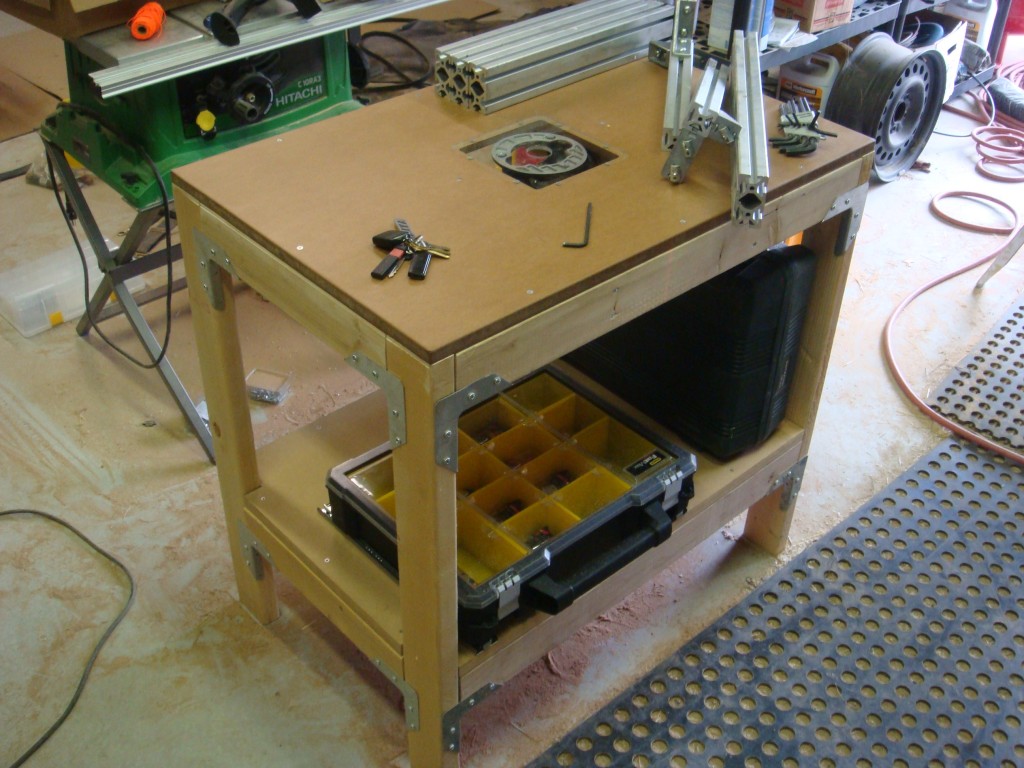
I made my own router table because, as usual, what is affordable and available in stores is lame and insufficient for my needs. I don’t really want to spend something like $500 just for a good router table so I made one. I also made my own adapter instead of buying one by re-purposing the fixed base I already had.
Training halter fixes pulling back, lunging problems
** Update: I’m sorry but I’m not making these anymore since we’ve taken a temporary break from horses. Thanks! **
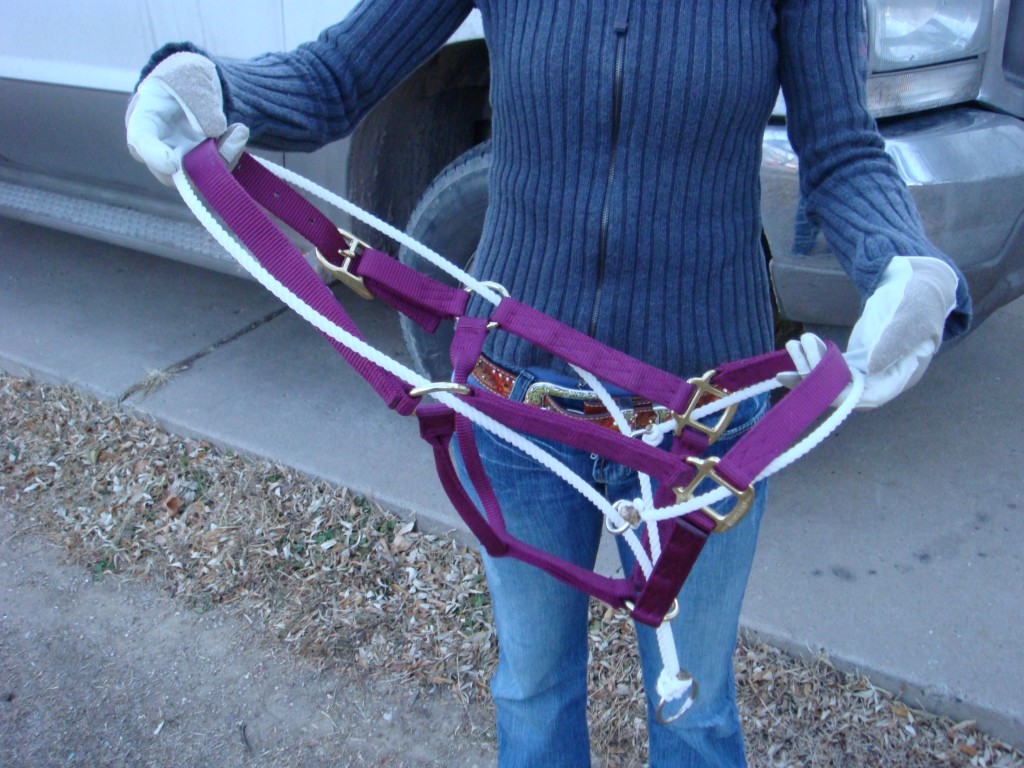
I came up with this halter while trying to help a friend get over some problems with her horse. He was fine most of the time, but when she went to take him out to the arena, he would decide it was playtime and do everything short of run over you to get his way. He was regularly pulling the lead rope right out of the hands of his owner so he could escape and run around. It was almost impossible for her to lunge him because he would throw his head to the outside of the circle and make a run for it. She didn’t want a really aggressive halter on him regularly, so I made a dual-purpose halter.
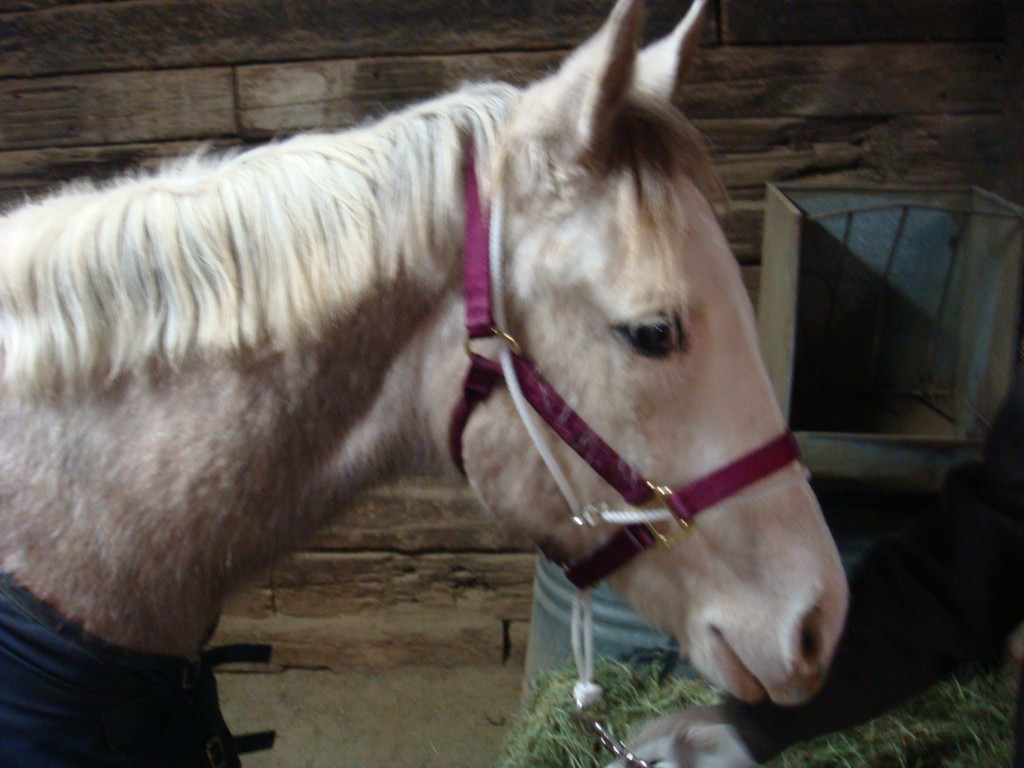
It’s a regular halter, with a hard poly type rope integrated into the nose piece and behind the ears. You can connect the lead rope to the regular halter for comfort, but the lead rope can be easily switched to the second ring and the poly rope will bite in all the right places to get the horse’s attention. It leverages pressure points on both sides of the face and over the poll. This lends it to stopping horses that want to either pull back or pull away. After it was completed we placed it on the young gelding finalizing the fit for pressure points. It worked very well both when he was tied up to stop him from pulling back and also while he was being lunged. If you are interested in purchasing one, send me an email.
My demo horse Shady
Piezo pump
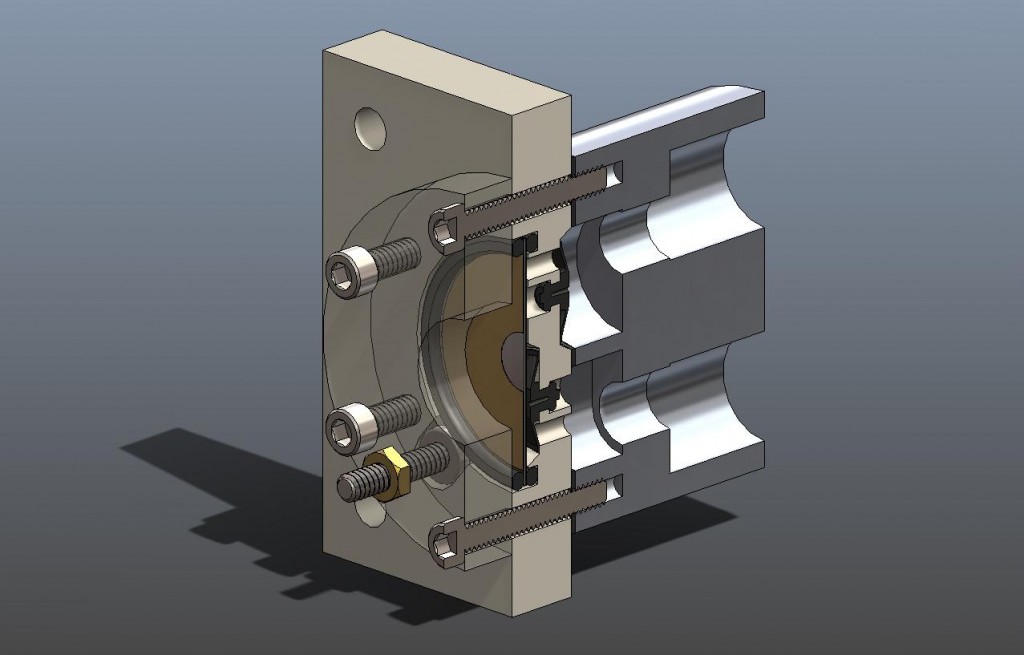
Some time ago I designed a piezo pump to demonstrate a concept for an extremely low flow liquid slurry pumping application. The pump was based around AdaptivEnergy’s Ruggedized Laminated Piezo actuator, or RLP-125. AdaptivEnergy also manufactures the Joule-Thief, which is also based on piezo technology. The actuator was driven by the company’s proprietary electronics that they call the Energy Key. I used umbrella valves from Vernay that allow the pump to build pressure and move fluid.
The pump works very well for extremely low flow liquid and slurry applications. The wetted parts of the actuator are 300 series stainless steel, and the valves and housing can be made of a number of materials for resistance to many fluids. This pump design is a great selection particularly if you are moving an abrasive slurry, as there are less contact wear surfaces like in a more conventional pump.
Perhaps the most interesting thing about this pump is that both the frequency and displacement of the element can be varied. This allows the pump to operate at different resonant frequencies for different fluids, and still accurately control flow.
Here is a 3D section view of the model that I made in Solidworks.
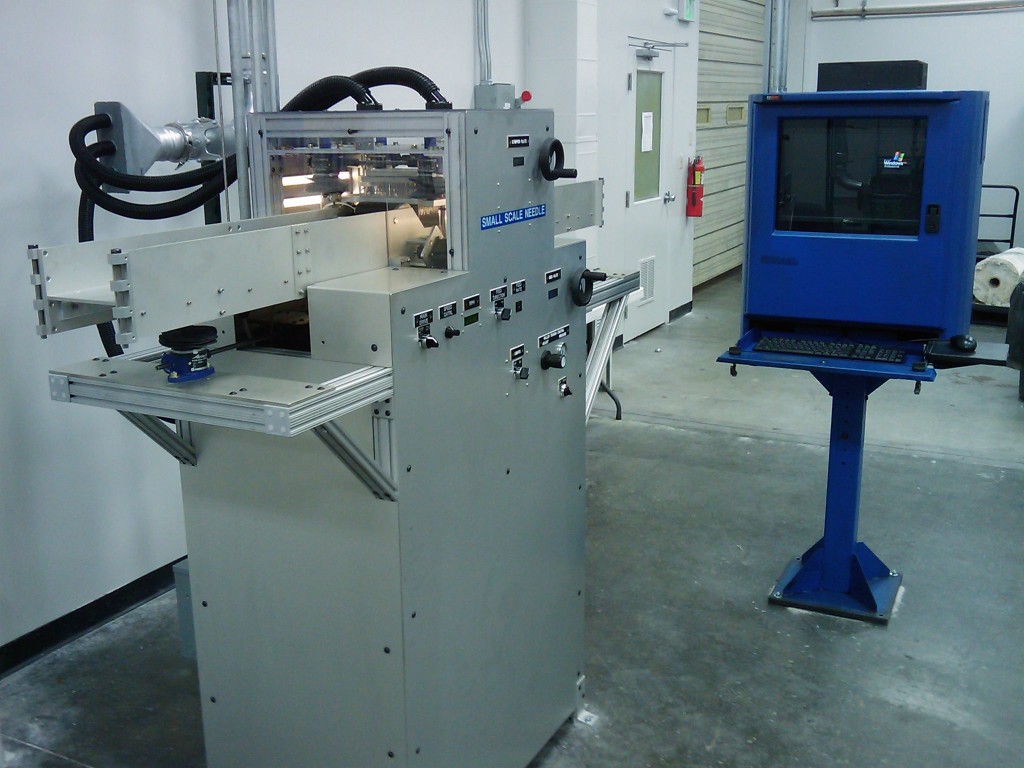
Textile needle loom
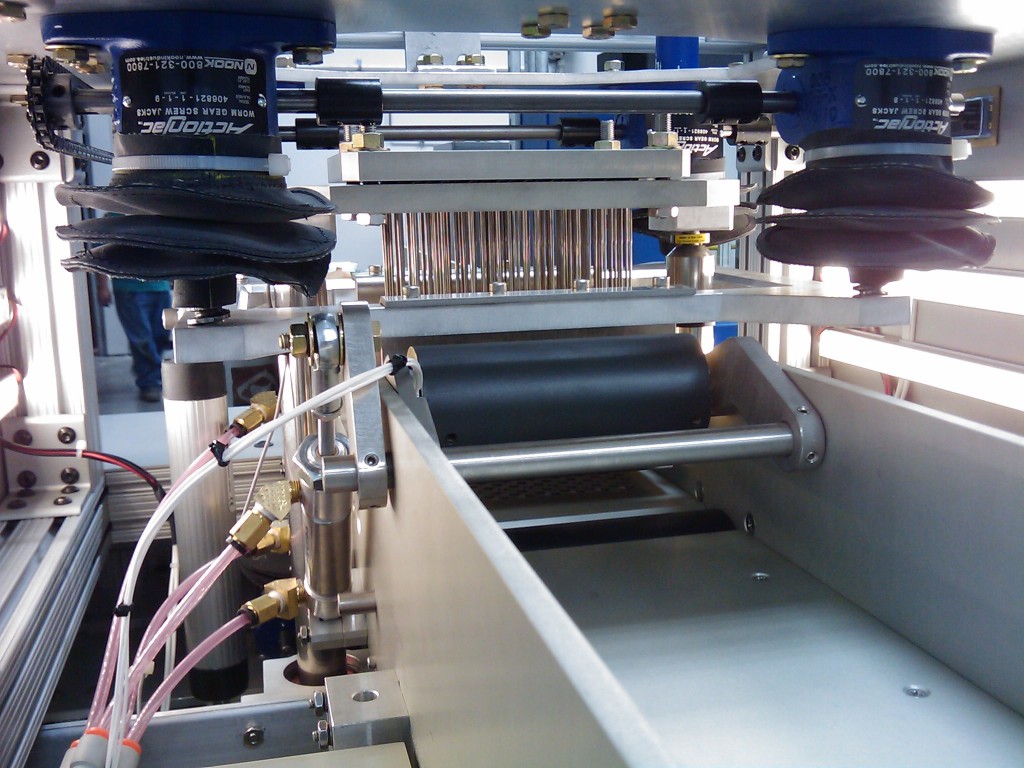
Probably the most complicated piece of equipment I’ve designed and built to date would have to be a textile needle loom for Goodrich. This machine is fully instrumented with position sensors, accelerometers, load cells, etc. for characterization of a textile needling process. Every parameter from speed and feed to force and distance is adjustable real time. This was definitely the most challenging mechanical design I have completed. I modeled the entire project in Solidworks to verify the design, and had over one hundred custom parts machined.
Other Stuff
Recent Posts
- 6CY7 dual triode valve amplifier
- Air quality sensor (TVOC and eqCO2)
- Automotive rear fill “surround sound” with Boss DD-3
- Spring tester / weight scale
- Ducati 749/999 Tail Light
- Instruments for the GSXR
- Light pipe tail light for the GSXR
- M17x 6990m / 6970m overheating
- PAR / Spectrum analyzer
- Acrylic polishing and scratch removal
Archives
- May 2019 (2)
- April 2017 (3)
- October 2015 (1)
- May 2015 (1)
- March 2014 (2)
- December 2013 (1)
- July 2013 (1)
- November 2012 (1)
- October 2012 (4)
- September 2012 (1)
- August 2012 (3)
- June 2012 (1)
- March 2012 (1)
- February 2012 (1)
- January 2012 (1)
- October 2011 (3)
- July 2011 (1)
- June 2011 (3)
- May 2011 (2)
- April 2011 (1)
- December 2010 (1)
- August 2010 (1)
- July 2010 (3)
- April 2010 (2)
- March 2010 (2)
- January 2010 (2)
- December 2009 (2)
- October 2009 (2)
- September 2009 (1)
- August 2009 (15)
